Azure - Creating an Azure Cloud Service
I've been investigating setting up a Worker Role to do something similar to a Windows Service and it seems that the Worker Role is best suited for this purpose.
You might create a Worker Role to Poll a Message Queue, or process some data in a database, or scrape some data and persist it, etc. I'm going to throw some data in http://www.ravenhq.com every minute, for this blog post, nothing exciting, but demonstrates how to create a WorkerRole and get it up and running on Azure.
I suspect that you could use NancyFX Self-Hosting here and host a basic Nancy website, that would be cool :)
Building the Service (Worker / Role)
If you haven't already you will need to install the Azure SDK, so head on over to http://www.windowsazure.com/en-us/develop/net/ and click "Install SDK" which will give you the option for 2012 or 2010. I picked 2012 because I don't know what 2010 is, I stopped living in the past.
The installer actually uses Web Platform Installer, not sure if there's any other way to install it.
Once installed you can create a brand new project in Visual Studio.
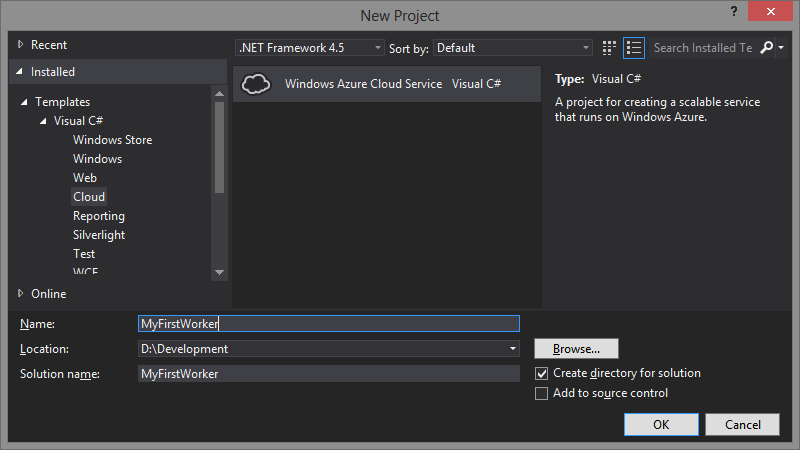
After hitting OK you're presented with a new screen to pick your Cloud Service.

I'm not sure what that 'Visual Basic' thing is, and I don't know F# so from the Visual C# list, pick Worker Role and throw that to the right hand side, then right click it and rename it (or click the little pen icon)
Once you press ok your project is created and ready:

The MyFirstWorker is the Azure configuration stuff, I'll get to that when we deploy. For now we will work in MyFirstRole
The project comes with a WorkerRole file which stubs out the code we need
namespace MyFirstRole
{
    public class WorkerRole : RoleEntryPoint
    {
        public override void Run()
        {
            // This is a sample worker implementation. Replace with your logic.
            Trace.WriteLine("MyFirstRole entry point called", "Information");

            while (true)
            {
                Thread.Sleep(10000);
                Trace.WriteLine("Working", "Information");
            }
        }

        public override bool OnStart()
        {
            // Set the maximum number of concurrent connections
            ServicePointManager.DefaultConnectionLimit = 12;

            // For information on handling configuration changes
            // see the MSDN topic at http://go.microsoft.com/fwlink/?LinkId=166357.

            return base.OnStart();
        }
    }
}
OnStart returns bool, and from my understanding the worker role hasn't started until it has returned true. This allows you to run any initialization tasks, and while you're setting up it will tell the Worker or Load Balancer that it's busy, until you're done and have returned true.
So I'm going to configure the RavenDB Document Store at this point.
I'm using RavenHQ, so this sort of needs prior knowledge of RavenDB / HQ to setup, but if you swapped this code for any other task the rest of the post should still apply.
public override bool OnStart()
{
    // Set the maximum number of concurrent connections
    ServicePointManager.DefaultConnectionLimit = 12;

    _documentStore = (new DocumentStore
    {
        ApiKey = "*api key removed*",
        Url = "https://aeo.ravenhq.com/databases/philliphaydon-TestDatabase",
        DefaultDatabase = "philliphaydon-TestDatabase"
    }).Initialize();

    return base.OnStart();
}
There is also an OnStop method that you can override which gives you 30 seconds to clean up and persist any state etc. If you don't manage to clean up in 30 seconds, you're stuffed, it will terminate and you've lost anything you wanted to do... But 30 seconds is a LONG time...
The second method is Run is the task the role is going to run, it contains a while loop with the condition true to make it an infinite loop. This is really important because if you exit out of the loop, your role will terminate. Then it wouldn't really be a background service that is always running!
I'm not going to abstract anything out I'm going to write my code directly in the while loop for the purpose of this post :)
public override void Run()
{
    // This is a sample worker implementation. Replace with your logic.
    Trace.WriteLine("MyFirstRole entry point called", "Information");

    var count = 0;

    while (true)
    {
        try
        {
            using (var session = _documentStore.OpenSession())
            {
                session.Store(new Banana
                {
                    Colour = "Yellow " + count
                });

                session.SaveChanges();
            }
        }
        catch (Exception ex)
        {
            //TODO: Implement www.raygun.io
        }
        finally
        {
            count++;
        }

        Thread.Sleep(60000);

        Trace.WriteLine("Working", "Information");
    }
}
At this point if we hit F5 we can debug the role and make sure it's doing what we want to do.
A Windows Azure Emulator is started in your system tray, much like working with websites:
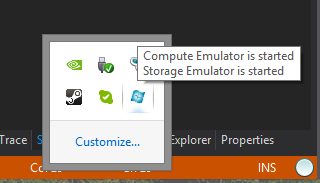
So right click and select 'Show Compute Emulator UI'

And you will be presented with a nice UI that shows your services running.

As you can see it's pumping out "Working" into the console and if I swap over to RavenHQ Management Studio:

I have some banana's being persisted.
GREAT. Now lets get this up and running on Azure!
Deployment Package
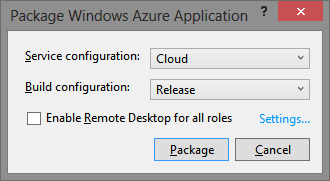
First up, we need to create a package, right click the project 'MyFirstWorker' and select 'Package', this will give you the an option to package up a configuration, we will select Cloud since we are going to be putting it on Azure now.
This results in two files being created.

The Package itself, and a cloud configuration file. These will be needed when we upload it to Azure next.
Deployement on Azure
Note: I've created a new blog post on how to Publish from Visual Studio for those who don't want to deploy from Azure Portal.
Now we need to create the Cloud Service and upload the package. Head on over to the Azure portal, and sign up if you haven't already. Click on Cloud Services:

Then create a new cloud service, This will pop-up a small work-flow at the bottom of the page:


After you've pressed Create at the bottom, a status will popup.

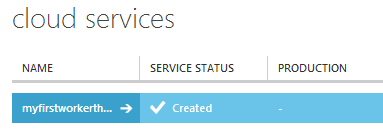
Now you can go back to the Cloud Services tab and your new service will be visible.
Click the first cell to navigate to the service, and select Upload a new production deployment (or staging, I'm doing production)

Now you can upload the package.
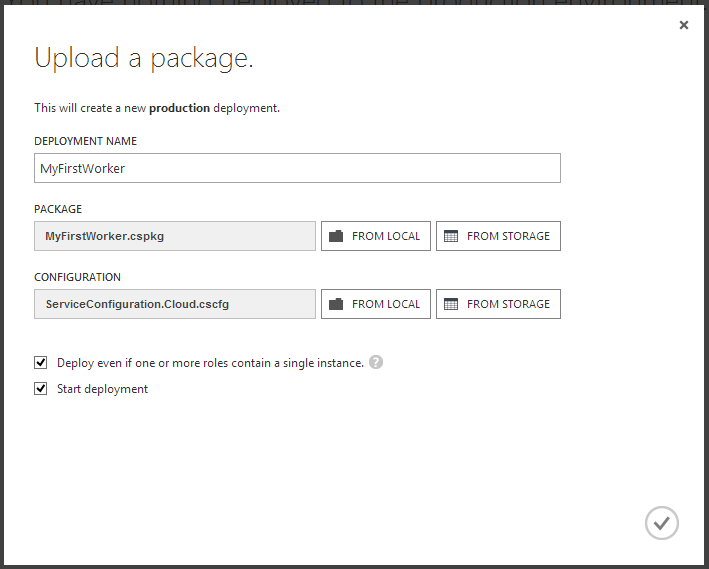
I selected the option Deploy even if one or more roles contain a single instance. since we don't need to worry about scaling. If it's a critical service you may want to deploy more than 1 instance to increase your availability.
Now your service is deployed.
Before deploying I reset my RavenDB database to have no data, so I wrote the rest of this blog post and it's been able 7 minutes...
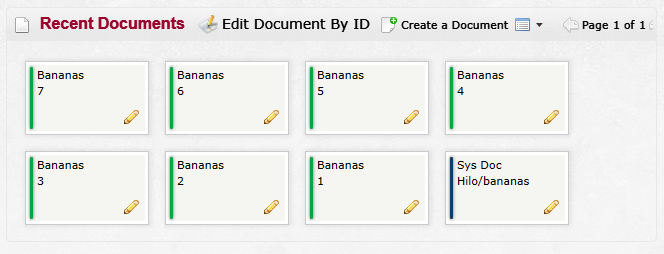
And we have 7 documents :)
That's it, easy peasy setting up a Azure Cloud Service from scratch to production.
comments powered by Disqus