Creating a drop area to drop a file in HTML 5
- Part 1: Loading an Image or Video from a File Input control
- Part 2: Creating a drop area to drop a file
- Part 3: Taking snap shots of a Video & displaying it
- Part 4: Uploading snap shots to Nancy (Or Web API)
- Part 5: Converting video in the browser using videoconverter.js (ffmpeg)
In the first post we uploaded a file and viewed it in the browser without sending it to a server, now we are going to create a drop area so that you can drag a file from a folder, into the website.
Using the same HTML as before, lets add a drop area:
<div>
    <input type="file" id="image-input">
    <input type="button" value="Load Selected Image" id="load-image" />
</div>

<div id="drop-area">
    Drop File Here...
</div>

<div>
    <img id="image-container" width="360" />
</div>
And add a bit of CSS to make it a little more visible:
<style type="text/css">
#drop-area{
    border: 1px dotted #666;
    background: #f2f2f2;
    width: 360px;
    height: 50px;
    vertical-align: middle;
    text-align: center;
    display: flex;
    align-items: center;
    justify-content: center;
}

#drop-area.drop {
    background: red;
}
</style>
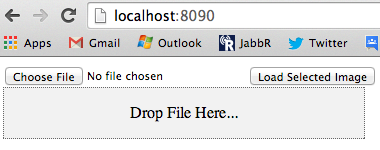
If we view it now it should look like:

Drag Enter
Now we have our UI set, we need to add an indication when the user drags a file...
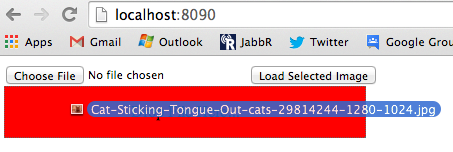
If we don't, it would look like this:

Which isn't very helpful, so first we need to attach some events for dragenter and dragleave so we can add/remove the class.
We use this instead of :hover because we only want the visual effect when the user is dragging something into the droppable area.
var dropArea = document.getElementById('drop-area');

dropArea.addEventListener('dragenter', function(e){
    e.currentTarget.classList.add('drop');
});

dropArea.addEventListener('dragleave', function(e){
    e.currentTarget.classList.remove('drop');
});
Now when we drag the a file over the drop area, we end with...

The hidden 'Copy'...
It took me a while to figure out why my code didn't work and it happens to be the bit people put in the sample code and never explain...
dropArea.addEventListener('dragover', function(e){
    e.preventDefault();
    e.stopPropagation();
    e.dataTransfer.dropEffect = 'copy';
});
In order for the drag to be captured, we need to set the dropEffect, by setting it to copy, apparently allows the source item (the item we're dragging) will be copied to the drop location.
The possible values on W3 and MDN
- copy: A copy of the source item is made at the new location.
- move: An item is moved to a new location.
- link: A link is established to the source at the new location.
- none: The item may not be dropped.
Setting this value on dragenter doesn't seem to do anything, it only works when doing it on dragover
Lets capture it and render it!!!
All that's left now is to touch the drop event...
dropArea.addEventListener('drop', function(e){
    e.preventDefault();
    e.stopPropagation();

    var file = e.dataTransfer.files[0];
    var fileUrl = window.URL.createObjectURL(file);

    image.src = fileUrl;
});
Like when we load the file from an input control, we get a collection of files. Since we're only dragging 1 file for testing, we just grab the first file, create a URL, and load it...
Now when we drop out cat picture!

BAM Now we have Pizza Cat! :)
comments powered by Disqus