Using AWS's API Gateway to recieve Sendgrid event hooks and shove them in SQS
Sendgrid hooks allow you to recieve notifications of events that occur to the emails that you send, such as, was the email clicked, was it bounced, was it unsubscribed, etc.
A list of events can be found here
When sendgrid send the events, they send an array of events, so it may not be ideal to process those as they come in, and rather just accept them and process them when you can. To do that you can use AWS's API Gateway to accept the request and push the JSON body to SQS.
Steps:
- Setting up the Queue
- Setting up the Policy
- Setting up the Role
- Creating the API Gateway
- Test with Console
- Test with Postman
Setting up the Queue
First up we need to create a new Queue, so in the AWS Console navigate to the SQS Service, and click Create New Queue. I'm calling my queue SendgridEvents.
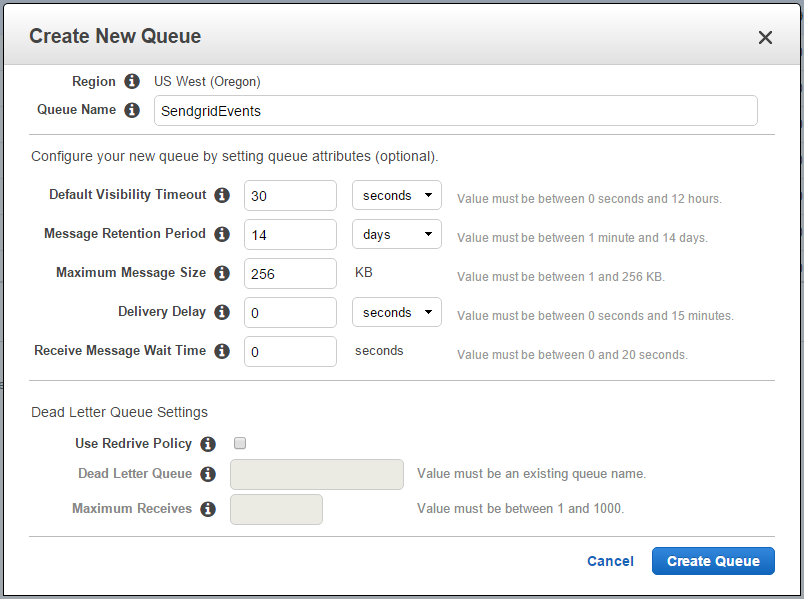
Once created, click on the queue and look at the details.
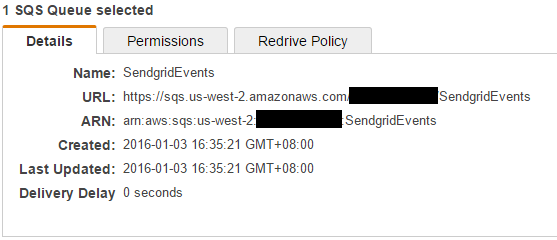
Make note of the ARN value, we need that in the policy.
Setting up a new Policy
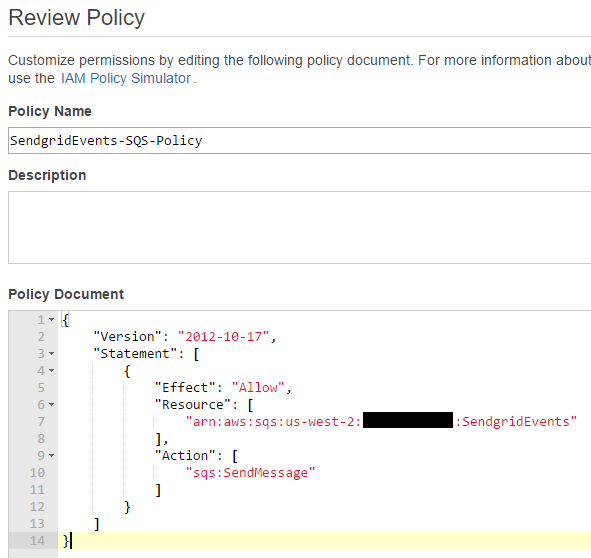
Next head on over to the IAM Service and navigate to Policies. We want to create a new policy, select Create Your Own Policy
Name the policy and add the following to the Policy Document:
{
    "Version": "2012-10-17",
    "Statement": [
        {
            "Effect": "Allow",
            "Resource": [
                "arn:aws:sqs:us-west-2:1111222233334444:SendgridEvents"
            ],
            "Action": [
                "sqs:SendMessage"
            ]
        }
    ]
}
This says we want to allow the sqsSendMessage only for the SendgridEvents queue we just created. This means that the Role we create will not allowed to be do anything else.
Note: the 1111222233334444 value should be your account id that you will see in your own ARN, you don't need to change this value.
Setting up a new Role
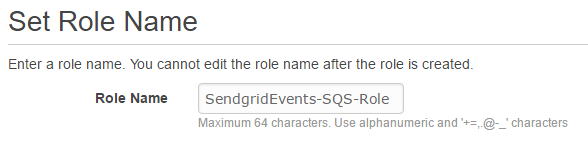
Staying in IAM, navigate to Roles and select Create New Role.
Enter a Role Name
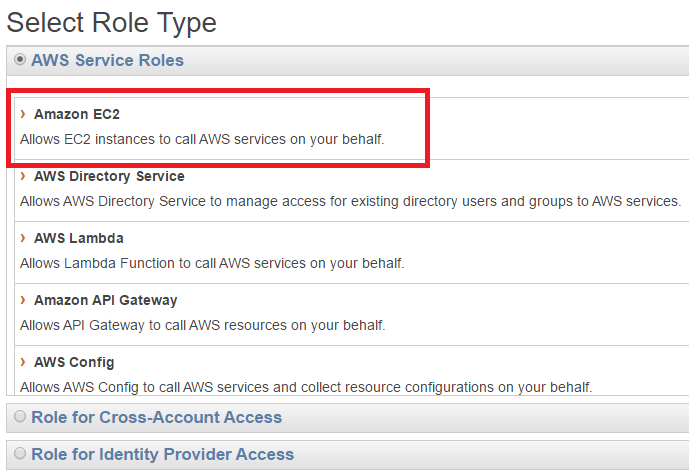
Select from the AWS Service Roles list, Amazon EC2
This should skip over the Establish Trust, we can't navigate back to it, but we will fix that shortly.
Attach your policy that you just created.

Your policy review should look something like this.
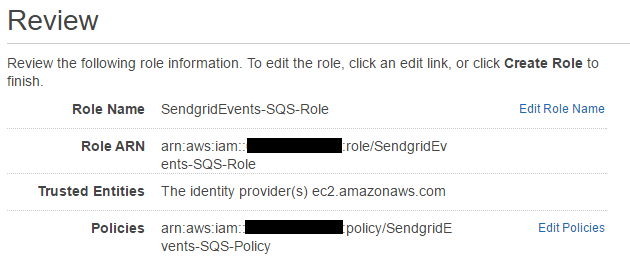
Make note of the Role ARN, we need this for the API Gateway.
Hit Create Role, and we're done... almost...
Find your newly created role.
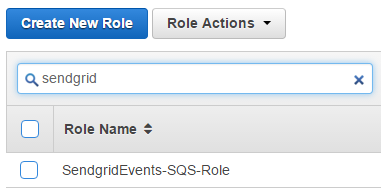
Click on it to select it, and then click on Trust Relationships.

Change the Service to apigateway.amazonaws.com
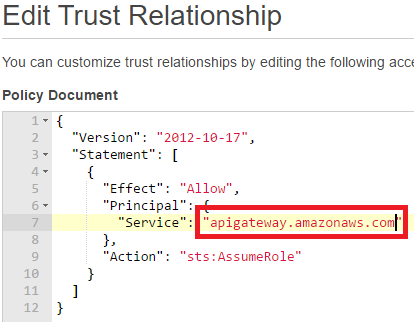
And then hit Update Trust Policy.
Now we have setup a Queue, a SendMessage Policy, and a Role for use on the API Gateway service.
Creating the API Gateway
Navigate to the API Gateway Service and click Create API
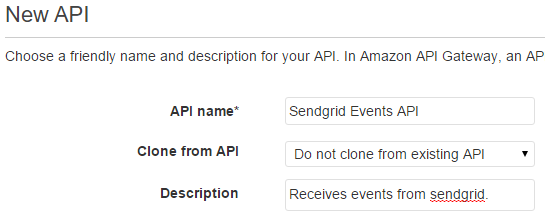
Give it a name and description
Because this API's sole purpose is to only accept requests from Sendgrid, I wont create any resources. Just a method.
Click Create Method, and select POST

In the setup we want to click Show advanced in the Integration type list. This allows us to select AWS Service Proxy
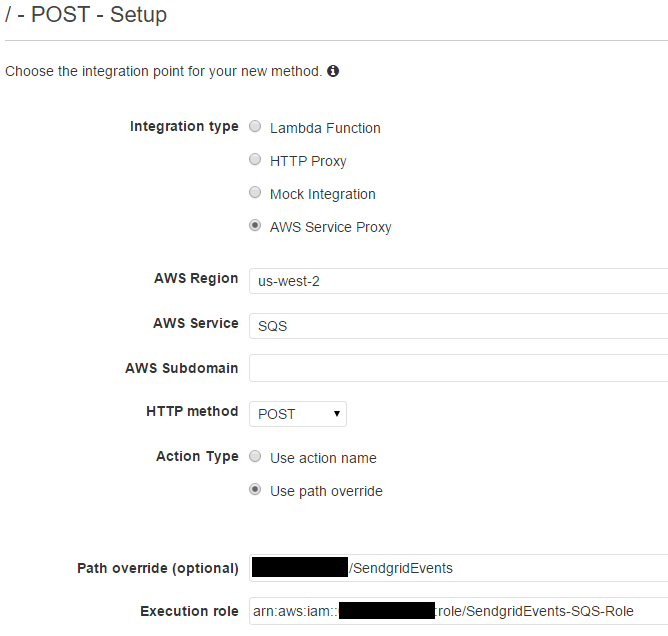
- AWS Region: The region must match the region the queue was created in
- AWS Service: SQS
- HTTP method: Since we are accepting JSON we need a POST for large requests
- Action Type: Use path override
- Path override: This is the last portion of the ARN we copied when creating the Queue. It should be your ID + Queue Name. i.e
1111222233334444:SendgridEvents - Execution role: This it the Role ARN we just created
- Path override: This is the last portion of the ARN we copied when creating the Queue. It should be your ID + Queue Name. i.e
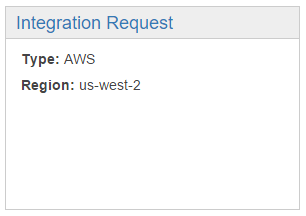
Click Save. Next we want to go to Integration Request.
Under HTTP Headers, add a new header for Content-Type and set the value to 'application/x-www-form-urlencoded' (including the single quotes)
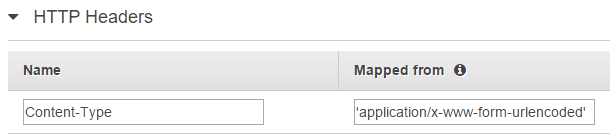
SQS only accepts two types of requests:
- GET: Where the values are passed via Query String
- POST: Where the values are passed as URL Encoded FORM Payload
But Sendgrid sends us JSON, so we need to parse the JSON into a URL Encoded FORM payload.
If you don't change the Content-Type, then SQS will reject the request because the Content-Type is incorrect.
Hit the little Circle Tick on the right hand side to save (bad UI)
Next we want to add a Mapping Template.

Set the Content Type to application/json this is what we will map from. Since Sendgrid will send us a JSON request, we need to map from that to the url encoded payload.
After adding it, click it to change the mapping from Input Passthrough to Mapping template
Set the template value to:
Action=SendMessage&MessageBody=$util.urlEncode($util.escapeJavaScript($input.json('$')))

Broken up this is 2 keys:
- Action: SendMessage, this matches the Policy we created, it's the action we want to take on the Queue.
- MessageBody: This it the JSON payload from Sendgrid that we escape so we can send it to SQS.
Again we want to click that little Circle Tick icon to save.
Testing with the console
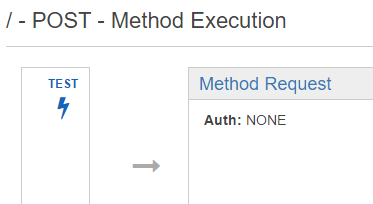
If you've followed along this far and understood everything, in theory it should all be configured correctly. So we will click TEST
On this screen, click Request Body and enter in some valid JSON.
Sendgrid actually give you a sample of what they will send so we can use that for testing:
[
  {
    "sg_message_id":"sendgrid_internal_message_id",
    "email": "john.doe@sendgrid.com",
    "timestamp": 1337966815,
    "event": "click",
    "url": "https://sendgrid.com",
    "userid": "1123",
    "template": "welcome"
  }
]
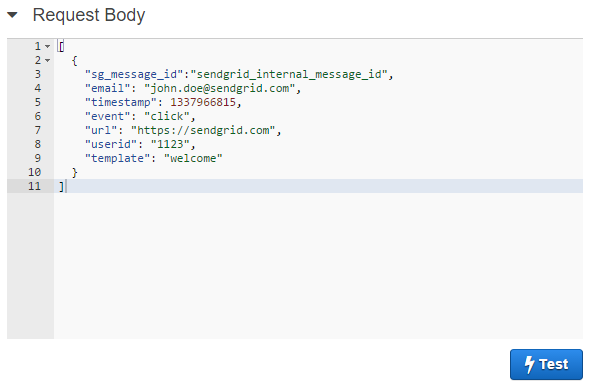
Hit Test and it should send that JSON off to SQS and return a 200 status back:
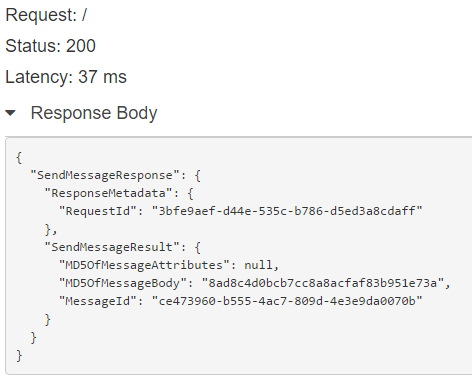
BAM it's working :)
Testing with Postman
From the same screen you can click Deploy API
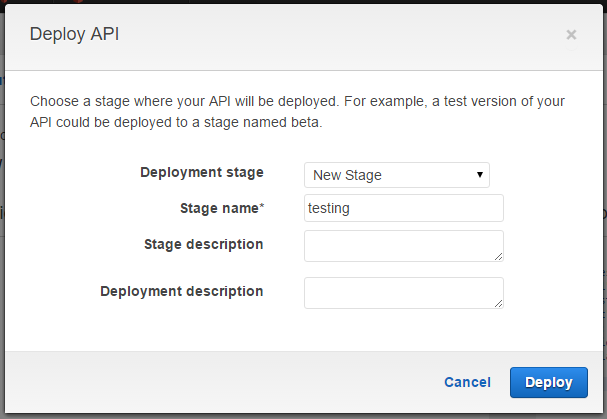
Select New Stage and set a stage name. You can have many different stages for testing different things. We can create a test one for now and a production one later.
Once it's deployed it will take you to a Stage Editor with an Invoke URL like so:
Invoke URL: https://snipped.execute-api.us-west-2.amazonaws.com/testing
Taking the URL, we can fire up Postman, and enter in the URL that Amazon gave us:
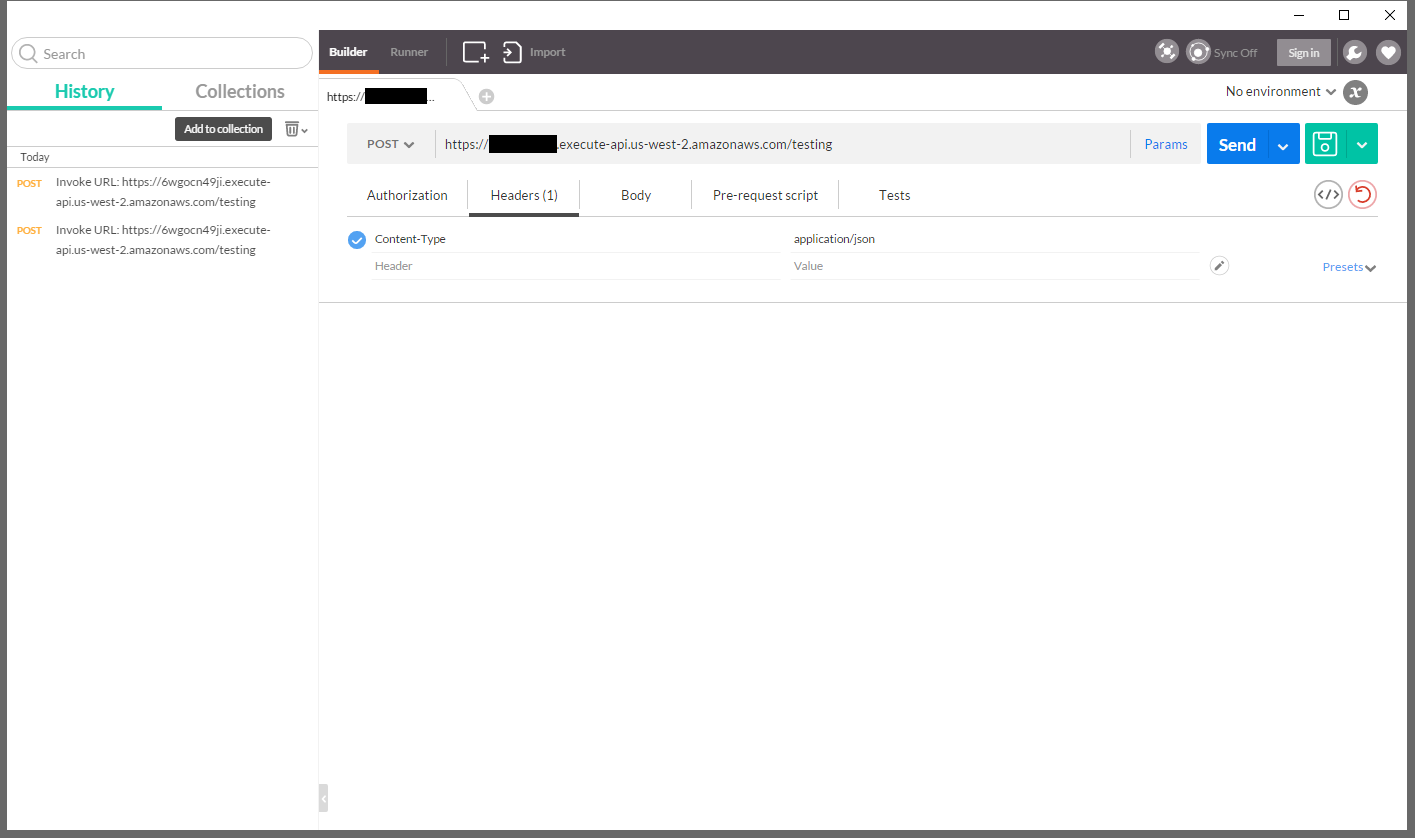
Set the Content-Type to application/json
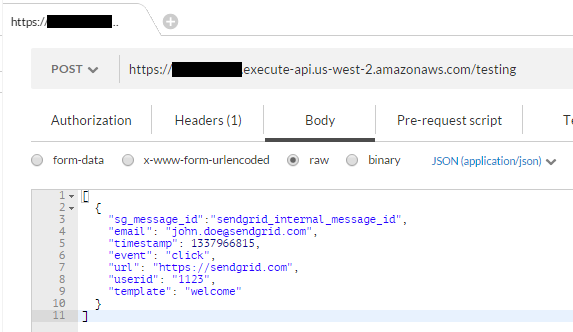
Enter in the same JSON we entered for the Console test, and click Send
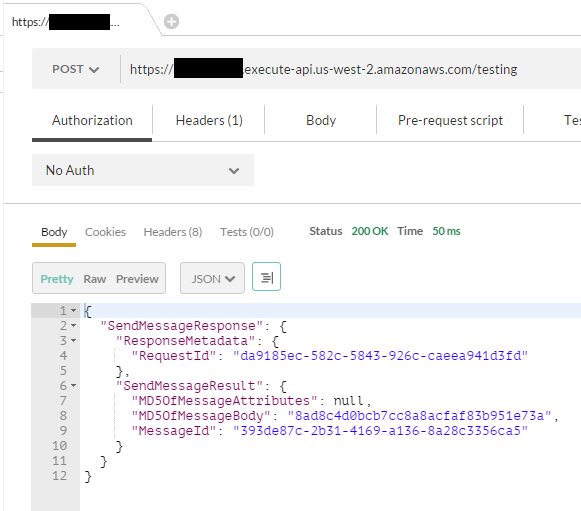
And like the console, we get a result :)
That's it!
comments powered by Disqus